
Tools Needed for Stained Glass Artists
- maggie Courtis
- Dec 19, 2024
- 5 min read
Updated: Jul 10, 2025
Working in glass arts requires quite a few tools. This list make the task of setting up your workshop less daunting. Quality varies with all glass products. Buy the tools needed for stained glass from a reputable, dedicated glass/crafts company to avoid receiving poor quality knock-offs.

Making A Pattern
Ruler
Pencils - for drawing
Pencil - for transferring the pattern, preferably red
Card Stock Paper
Graph Paper
Plain Paper
Graphite Paper (carbon paper)
You can purchase these supplies at art or office supply stores.
Cutting the Pattern
Pattern Sheers
Envelopes, Paper Clips, and/or Binder Clips
See our blog post, Creating a Pattern, for details about how the supplies for designing, cutting, and organizing the pattern are utilized.
Cutting Glass
Fine Point Felt Tip Pen, Black
Fine Point Felt Tip Pen, White
Permanent markers take more effort to clean. They make the cutting process easier because they don't smear.
Purchase any good quality marker,
office supply, brands include Sharpie or Avery
drafting or technical pens
Glass Scoring Tool
A variety of scoring tools are available.
Self-oiling or manual oiling
Various grip styles
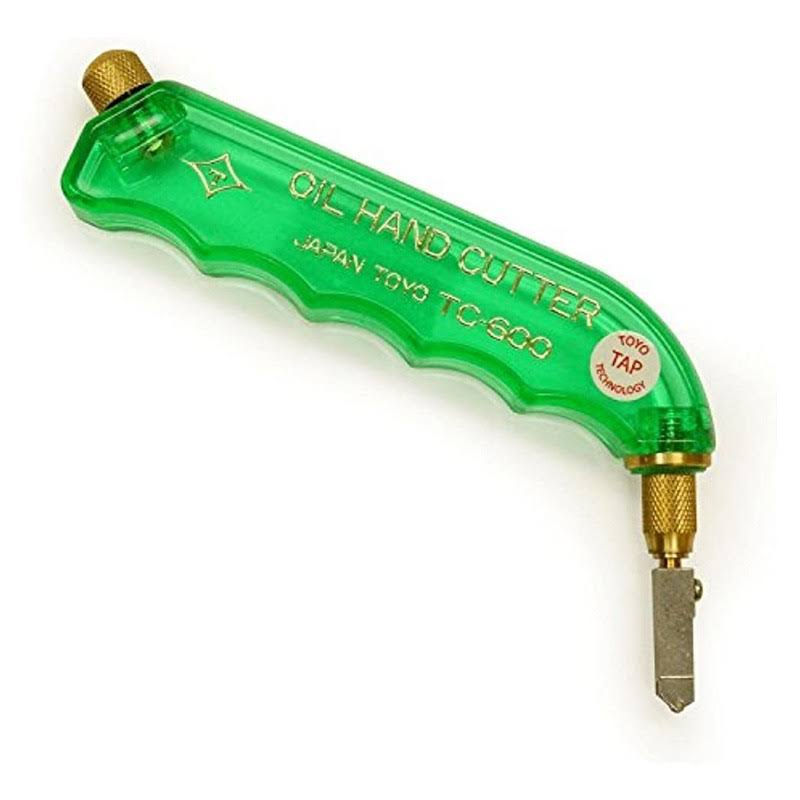
Cutting Oil
To maintain the integrity of the wheel on the scoring tool, it needs to be lubricated with cutting oil. You can score without oil, but your tool will degrade much faster.
An internet search will give you a variety of ideas on which oil or combination of oils makes the best cutting oil. I recommend purchasing oil from a stained glass supplier.
Pliers, 3 Types
I recommend having one set of each.
Breaking pliers
Running pliers
Grozing pliers

Breaking pliers Running Pliers Grozing Pliers
A Soft Bristled Brush
The softer the bristles, the better job the brush will do.
Specialty bench brushes are available.
A soft paintbrush, about 4-6" wide, works well.
Safety Tools: Glasses and Dust Mask
Safety glasses are an absolutely essential part of the tool kit, particularly important when using the glass grinder.
Grinding glass puts dust into the atmosphere in spite of the fact there is water lubricating the grinding wheel. A dust mask can prevent inhaling ground glass particles.
Padding for Glass Cutting
Glass cutting waffle grid mats made for cutting glass are made of plastic. The raised grid surface catches the glass fragments in the recesses and keeps the glass elevated above the debris.
Another useful cutting mat for glass is a self-healing hobby mat, which is easier on the cutting tool than a hard table surface.
You can use newspaper as a padding under the glass while cutting the glass.
Assembling Cut Glass
For leaded pieces:
Lead Knife and/or Nippers
It's important to invest in a very high quality lead cutting tool.

Lead knives and lead nippers cut through the lead. I have both in my kit, and use both.
Sharpening Stone
for maintaining your lead knife or nippers
Your kitchen knife sharpening tool might work well.
Horseshoe nails
A small hammer
Fid

The stained glass hammer has both rubber and dense plastic surfaces. This is my favorite fid. The pointed end is useful for opening lead came and burnishing foil. The flat end can be shoved under a piece o glass and used to lift the glass to help guide it into the lead channel. Lead came
Border came, usually zinc
For Copper Foiled Pieces:
Copper Foil
As with all glass products, quality varies. The lower quality copper foil doesn't have the same adhesive properties as better quality, which can be frustrating if the foil doesn't stick to the glass.
Foil is available with black backing. If you don't center the foil exaclty, you can see the back of the foil through transparent glass which results in a shiny copper line at the edge of your solder bead. The black background blends well with solder that has been treated with black patina.
Burnishing Tool
Special tools are designed for burnishing.
Any smooth surface will work.
the side of your felt pen or pencil
the fid pictured above
Craft Knife (optional)
The small, inexpensive, craft knife can give you a quick, clean cut of your copper foil.
Scissors or an exacto knive also work, as does tearing the foil.
Copper Foil Holder (optional)
Copper Foil Application Tool (optional)
Soldering
Soldering iron

The Hakko FX601 is an excellent, high quality tool with a built in temperature controller. Be sure to buy this from a stained glass supplier to avoid getting a poor quality knock-off. Soldering iron stand
Flux Brush
Solder
The number rating indicates the proportion of tin to lead in the solder.
60/40
Produces a higher, rounded bead or seam
Melts at around 374 F, sets at around 361 F
Best for copper foil
50/50
Produces a flat bead or seam
Stays liquid longest
Melts at around 421 F, sets at around 365 F
Best for leaded pieces as typically a high bead is not desirable
Works for copper foil when seeking a flatter solder bead
63/37
This solder sets as soon as the heat source is removed.
Best for decorative purposes, adding embellishments once the piece is finished
Flux
Flux is a slightly acidic chemical used to solder.
Solder will not adhere to other metals without the use of flux.
Rheostat (optional)
Plug a soldering iron into a rheostat controller to dial in lower temperatures.
Wire Brush (optional)
Products to Clean the Soldering Iron
Solid Sal Amoniac
Hakko tool
Chemical paste
Wet sponge

I've found a wet sponge works as well as the more sophisticated tools.
Finishing
Patina
Patina is a chemical applied to the metals (solder, lead, zinc) to give an instant aged appearance.
The metals each oxidize at different rates, which gives you bright solder joints on dulled lead for a long while until the solder ages and oxidizes too.
Patina products are available in black, copper, and shiny copper.
Patina brush
To Finish Leaded Panels
Window glazing putty
available at hardware stores
Stained glass suppliers sell black window glazing putty.
Sawdust or stained glass whiting powder
You also need these items:
Glass
A surface to build the piece
The surface for assembling a panel needs to accept nails.
Small projects can be assembled on cork board using carpet tacks or heavy pins rather than horseshoe nails.
Styrofoam molds are available to construct lamps.
Reinforcement material (may be necessary for larger pieces)
Because lead is soft and flexible, wider windows need reinforcement to protect the glass from the potential of stress causing the glass to break
The reinforcemnts are thin coppered steel strips that are placed in the lead channel or between the foiled pieces, strengthening the lead or foil/solder
Brands include Copper Re-Strip, Morton Strongline, and Flex-Bar
Apron (optional)
Wire (may be necessary, depending on the project)
Wire is used to create a hanger for sun catchers, ornaments, or small panels hung without a frame.
Tinned copper wire is available in various gauges. I use 18 for small ornaments, heavier gauge wire for heavier pieces.
Soldering board (optional)


Comments